
This chapter contains the following topics:
Printing a List of A/P accounts
An accounts payable account is a current liability in your General Ledger summarizing the amount of money owed to your vendors for goods or services you have received.
All accounts are included in Valid G/L Accounts, but some accounts are in separate files of their own. A/P accounts fall into this category. This ensures that payments will be associated only with accounts intended for that purpose.
Accounts Payable provides for an unlimited number of accounts payable accounts. You may define as many as your business needs.
You can set up multiple A/P accounts and then assign each vendor to one of those accounts. All postings (payables and checks) for a vendor debit, or credit, the A/P account associated with that vendor.
Select
A/P accounts from the A/P menu.
Graphical Mode
A screen similar to the following appears:
The list box displays up to 6 A/P accounts at a time. You may sort the A/P accounts by account number in ascending or descending order. Only column names in red may be sorted. Click on the column name or the arrow to the right of the column name to change the sort or use the View options.
To locate an A/P account, start typing the account number. You may also use the up/down arrows, Page up, Page down, Home and End keys to locate an item. The <F1> and <SF1> keys are the same as the up/down arrow keys.
A/P accounts that display in the list box are available for changes or deletion. The fields for the selected A/P account display in the lower part of the screen.
When an A/P account is found, you may select the <Enter> key or Edit button to start editing.
You may select a button or keyboard equivalent for editing, deleting or adding a new purchasing address:
| Button | Keyboard | Description |
|
New |
Ctrl+n |
To enter a new A/P account |
|
Delete |
Ctrl+d |
To delete the A/P account selected in the list box. You may also select the <F3> key to delete |
|
Edit |
Ctrl+e |
To edit the A/P account selected in the list box |
|
Save |
Ctrl+s |
To save a new A/P account or changes to an edited A/P account |
|
Save/New |
Ctrl+w |
Same as Save button plus the New button |
|
Cancel |
Ctrl+c |
To cancel adding or editing an A/P account |
|
Exit |
Ctrl+x |
To exit the screen. You may also use the <Esc> key |
Menu Selections
At the top left of the screen menu selections are available. Most of these selections are the same from screen to screen. Some of these selections may be restricted. If the menu selection is grayed out, then you will not be able to access it. The selections that are unique to this screen are explained here:
Selecting the Print menu accesses the A/P Accounts List. See Printing a List of A/P accounts
Character Mode
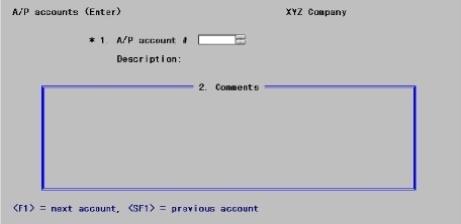
Use this screen to work with new and existing A/P accounts.
Enter the following information:
Options
Enter the A/P account number. If the account does not exist in the Valid G/L Accounts file, you can add it here.
|
<F1> |
For the next A/P account on file |
|
<SF1> |
For the previous A/P account |
|
Format |
Your standard account number format, as defined in Company information. |
|
Example |
Enter account 2000-000 |
If this account already exists in the Valid G/L Accounts file, its description is displayed. If not, the message NOT A VALID G/L ACCOUNT is displayed. You are prompted to add it. Answer Y to add the account, or N to enter a different account.
If the account is already on file, its description is displayed. If it is not, and you want to add it, enter the account description here. The result is the same as if you had entered the account using the Valid G/L accounts feature.
|
Format |
30 characters |
|
Example |
[Displays automatically in this example] |
Enter any comments about the A/P account.
For character mode refer to the Using Notes section of the User of Function Keys, ToolBar and Windows chapter in the System User documentation.
|
Format |
10 lines of 65 characters each |
|
Example |
Type Primary A/P account |
Options
In character mode, make any needed changes, or use one of the options:
|
<F1> |
For the next A/P account on file |
|
<SF1> |
For the previous A/P account |
|
<F3> |
(For an existing entry only) Used to delete this entry. You can not delete an A/P account if it appears as a default in Control information, and you should not delete it if any vendor is still using it as its default A/P account. |
|
Example |
For practice, as well as to enable you to use some of the other A/P features, enter the other accounts from the report at the end of this chapter. |
Select
A/P accounts from the Reports menu.
Using graphical mode you may also select Print from the A/P accounts entry screen.
Graphical Mode
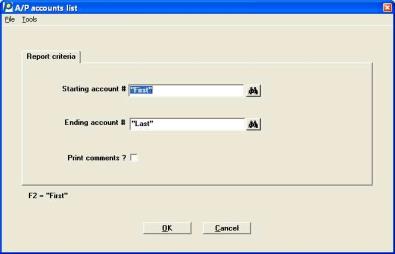
From the screen that appears, enter the following information:
Starting account #
Ending account #
Options
Enter the range of account numbers you want to print, or use the option:
|
<F2> |
For the <First> starting A/P account or the <Last> ending account. |
|
Format |
Your standard account number format, as defined in Company information |
|
Example |
Press <F2> at each field |
Determines whether comments are printed or not.
|
Format |
Check box |
|
Example |
Select <Space bar> to insert a check mark |
Make any needed changes. Press <Enter> or click on OK to print the A/P Accounts Edit List. Click on Cancel to return to the menu.